Wednesday, June 09, 2010

Magnolia Ink #4 Magazine


Order Magnolia INK #4 Magazine at

http://www.magnoliaink.nu


We are waiting and finally it is hitting the stores around the world this week !!!...the theme for this issue is

Bon Voyage/Summer

and it will be include in below topics:

* Coloring with Prisma Color.  * Interview with Tim Holtz. * Travel, Summer and Zoo.  * Recipe for beverage. * Beach, City, India and Australia. * Tutorials *.

Hopefully my 4 cards will be published in this magazine:-)) Happy Magnolia-inggggggggggggg!!!


Saturday, May 29, 2010

Magnolia Fairytale Doilies Hanger


Hi my dear friends,

How are you recently ? I am glad that I am able to make something fun this weekend:-) We have terrible weather here with average 32 degree celcious everyday, so it's a good excuse that I sit in my craftroom to have some fun:-))

OK, today I want to share with you Magnolia Doilies Hanger, all the rubberstamps are from Fairytale Collection, which is very HOT now:-)) For the first rubberstamp, I used Bubbling Tilda, the second rubberstamp is Ballerina Tilda and the third one Fairy Dust Tilda. All you can purchase from Magnolia, Sweden, if not, you can purchase them at many of the online stores.

Here are the list of the materials for this project, it's very fun and simple.
A) Magnolia rubberstamps( Fairytale Collection and also two old collection sentiments)which you can get them at www.dreamcottage.nu

B) Three 5 Inches Diameter Doily from Royal Lace, they are gift from my fellow Magnolia DT Malin from Sweden, thank you very much sweety:-)

C)Three coasters that you can buy at any stores, I buy them from local store, Daiso, and there are cheap and can be used in crafting too...nice!

D) Inks: Tsukineko Memento Ink( Tuxedo Black), Ranger Distress Ink-Vintage Photo, Mustard Seed)

E)Embelishments: Prima Marketing Paper flowers, Crystal Branch from my local shop,ribbon, rhinestones,pearls, Ranger Ice stickles.

Here are the very simple and easy steps:

1) Stamp Tilda directly on the coaster, one by one and color them with any medium that you like, I colored with Copic Ciao Markers. For the skin , I just used Skin White E00.I also put some Ice stickles on Tilda, specially you can see the Bubbling Tilda's wings, I love how it look.I distressed the coaster with Ranger Vintage Photo Distress Ink.

2) Stamp the sentiments on white cardstock , cut it out and inked with Vintage Photo+ Mustard Seed

3) Glue red gingham ribbon and lace on the doily then glued the colored Tilda( the coaster).

4) Decorate the doilies as shown on the picture or make it just follow your heart ( what you like ) :-))

5) Punch holes at the top and bottom of doily except the third one you just need to punch one hole at top.

6) Tie thread or ribbon through the holes to make the doily as a hanger. Voila! You have a beautiful Hanger!


I inked the white paper flower with Vintage Photo and put some ice stickles. I twisted and distressed the sentiment with Vintage Photo+Mustard Seed

I LOVE this sentiment very much and finally purchased them, looks so beautiful.I can't live without head pin:-))
                                            
                Pearls and rhinestones made the project looks more elegant and they are a final touch.

I hope you have inspired with my project and don't forget to try out at home and also send to a friend as a special birthday gift , if you have out of idea what present you want to buy for her/him( just change to Edwin, :-)). So, don't buy any present that your friend don't like....make some Tilda hanger, sure she will LOVE it:-))


Happy viewing and have a great weekend:-)


Sunday, May 16, 2010

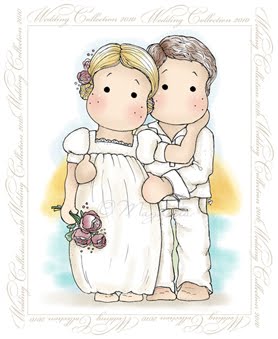
Wedding Collection 2010


You can have this very charming and beautiful wedding rubberstamps from Magnolia:-))


Saturday, May 08, 2010

Tilda Tussy Mussy Bonquet and some nice photos...


Hello my friends,
How are you today? I feel so Vintage today and finally made something nice for you to view, this is my pleasure:-))

Well, this is Tussy Mussy.
What is tussy mussy? According to some web search, it's a Victorian-style bouquet where a small bouquet of flowers is carried in a metal vase specifically designed to be carried. Often comes with a stand so that at the reception it can become a centerpiece.

I am a cardmaker, papercrafter, so I incorporated this idea into papercraft. I used patterned paper instead a metal vase to carry the small bouquet of flowers! It was so easy to make and I bet you will be addicted once you try it!

OK, Here are some materials needed:

Magnolia Tilda stamp that you can get it here, and I colored with Copic Ciao Markers.

1. Patterned paper as the base. I used Magnolia Patterned Paper- Lazy Summer Days ~ White Lace. Cut the paper 20cmx22cm and roll it into a cone shape.

2. Vintage patterned paper- my friend Martina from Austria gave me as gift long time ago..thank you very much Martina.

3. More and more embelishments~ paper flowers from Prima Marketing and Tab Craft(unfortunately she closed it due to some personal issue, but it's a good one:-)), Head Pins,Pearls, Pearls chain, crystal brands which I got from my local shop for some very valueable price:-))

4. Doily ~ gift from Malin, my fellow Magnolia DT from Sweden.Thank you very much Malin:-)

~As long as you can get some embelishments from your stash then you can make this very simple yet beautiful Tussy Mussy:-))

~~~~~~~~~~~~~~~~~~~~~~~~~~~~~~~
How I make it:

1.Glue white lace and brown trim on the 2 sides of the patterned paper.
Roll the 20cmx22cm patterned paper into a cone shape.It will make the Tussy Mussy 29cm in height.

2. Roll the Vintage patterned paper to cover the cone shape.

3. Cut a medium lace flower from a used tablecolth ( I have a lot of this used tablecloth, and it's antique, I think:-) and glue it on the Vintage patterned paper.

4. Decorate the flowers, head pins, crystal brands as the picture shown.

5. Glue the colored Tilda on the Tussy Mussy...I also put some Ice stickles on her wing and shoes:-)


                                I also "swinged" the pearls chain along the Tussy Mussy to make it more elegant:-) You can decorate anything as you wish:-)


Paper flowers made the Tussy Mussy looks stunning. I love paper flowers:-)


Thank you for your viewing, if you have a friend who you want to give her a gift and you can try out this idea...put some small goodies..crafting supplies into the Tussy Mussy...she/he must be very happy when they received it.

I had fun making this little gem in this afternoon...hope that you get some inspiration and try it!

~~~~~~~~~~~~~~~~~~~~~~~~~~~~~~~~~~~~~~~~~~~~~~~~~~~~~~~~~~~~~~~~~

Here I want to share some of the photos we taken when we bring our kids to a beach that near Malacca, the historical city in Malaysia. Yileen had fun playing at the beach and she reminded me she wanted to go again. The beach is very beautiful and the village has some stalls to sell fresh fish too:-)) The kids enjoyed very much, unfortunately Sam has photopbobia( LOL), I hardly show his photo here:-((

Thanks for viewing too:-))Hope you have a great weekend !


Saturday, May 01, 2010

CLP Sketch Challenge ~#25

Hi friends,
How are you today ?
I start my May with a sketch challenge by CLP Sketch Challenge Blog:-))
I am one of the DT and you know, there are so many talented DT in this challenge blog and I am so honor to have my card there:-))

How to join?
To join us, make a project with the Sketch provided.

You are welcome to use product from any company and combining challenges is not a problem.
Please enter only once, and be sure to link back to this Challenge.
You have until May 31st. to play along.

So, here are the sketch:


A big thank you to our May sponsor who is The Beary Scrap with a generous $20 gift voucher.


and ...Here is my contribution card for this sketch, I had fun played the Sugar Nellies  image...don't you think she looks so innocent? :-))


Supplies Used:
Stamp: Sugar Nellies, Text from Magnolia
Patterned Papers: K&Company
Embelishements: Prima Marketing Paper flowers,Brown gingham ribbon from Made With Love, pearls from Kaisercrafts,Pin from Making Memories,

Thanks for viewing, hope that you have a happy weekend and don't forget to join us at CLP Sketch Challenge Blog:-))

Thank you very much for all of your comments, emails and support each time I post a new post, you all are so sweet!!


Sunday, April 25, 2010

New DT postion...and some update...

Hi my dear friends,
It has been a while since I update my blog....life is busy...and my crafting life is continuing exciting too...
Firstly, I had been asked to be a DT for CLP Challenge Blog, it's a monthly sketch challange blog, I love how the blog looks, as it's so lovely and delicay:-)) I wish to thank Chelsea for her great opportunity for me to work with other 9 DT members. New challenge will be start on May I , so watch it out:-))

               http://clpchallenge.blogspot.com/

My friend from Norway , Helle Ness-Kvalvik gave me this award, I was too suprise, thank you very much Helle, you are so sweet!


I don't have any cards to show you as I was working on Magnolia Ink #4 magazine....you will be able to order the magazine in June, I think. Hopefully next week I can show you a card:-))

Have a great day and happy stamping!


Wednesday, March 31, 2010

Magnolia DT Card~ Magnolia INK #2 Magazine Front Page Card~Tilda Chasing Butterflies~How to make a Magnolia Tilda Card


GOSH!! The title is super long :-)) Oh my...I have waited too long to show you this card which featured on the front page of Magnolia INK #2 Magazine.....have you seen that?? I bet you have...but today I want to show you the whole card and a tutorial how to make a Magnolia Tilda card:-))

The card is very simple indeed and took me an afternoon to complete it.Thus...it's easy and simple to make a pretty-Scandinavia-Magnolia cards...as long as you know some tips....OK, here we go....
All materials from Magnolia rubberstamps, Sweden, except Ice stickles from Ranger and Pearls from Prima Marketing.
A) Tilda:
1) Stamp Tilda and flowers on Neenah white paper as the picture shown, you can stamp them on any white color paper as long as the color do not blur when you do your coloring.
2) Color Tilda with any color medium that you are comfortable with. For this Tilda,I colored it with Steadtler Color Pencils, blended with paper stumps and sansodor.
3) I used Vintage Photo distress ink to color the soil, add more water if you want light color and vs.
4) Stamp butterfly on the left hand side of Tilda. Stamp again on scrap paper, color it and cut out.Glue on the stamped butterfly, fold a bit to make it dimensional.
5) Sponge the edges of whole white paper with Vintage Photo distress ink ( this is my favourite color:-) and sponge more inside the card.
6) Mat the white paper on a light green cardstock, slightly bigger than it. Set aside...waiting to be use later....my cute Tilda;-))
(B) Label
1) Stamp Label on the Neenah white paper. Sponge Vintage Photo distress ink on it. Write some wording...I copied from Internet. Set a side.
(C) Card base ( I am so sorry that I totally forgot about the sizes of all the papers I used on this card...so sorry)
1) This is a 6"x6" card. I use burgandy color cardstock as the base.
2) Cut the ladybug patterned paper slightly smaller than 6"x6". I think maybe 5"x5"...oh...I really forgot...
3) Cut the green patterned paper bigger than the light green cardstock that you set aside before (that has Tilda on it)..Punch the right hand side with Martha Stewart Doily Lace punch.
4) Cut three burgandy gingham ribbons and adhere on the back of light green cardstock as shown on the picture. Two ribbons at the upper side and one on the bottom.
5) Mat the light green cardstock on the green patterned paper.
6) Place two ribbons( polka dot burgandy ribbon and sheer burgandy ribbon) on the ladybug patterned paper.
7) Adhere the whole green patterned paper( there has light green cardstock with Tilda on it) on the ladybug patterned paper ( with two ribbons on it).
8) Adhere the stamped label beside the green patterned paper.
9)Place all the flowers, leaves, rhinestones,pearls as shown on the picture. I punched the leaves with Martha Stewart punch.
10) Put some Ice stickles on flowers, label and butterfly.
Viola ! You have your very cute Magnolia Tilda card.
Some tips for you:
!) Use light patterned papers. Magnolia patterned papers are recommanded.
2) Use flowers...flowers...and flowers.....
3) Use distress inks to sponge the edges of papers....Vintage Photo, Antique linen, tea-dye ...
4) Use rhinestones, pearls, stickles to make it more elegant and stunning.
5) If able, make the card full with layers......
Further reading:
1. Distress Ink coloring:
2. Copic Coloring:


I do hope you have fun to make the Magnolia Tilda card as I have and I wish that this mini tutorial can help you a bit:-)) Please forgive my poor English in this mini tutorial.:-)

Happy Magnolia-ingggggggggg!!!!!!!


Footer