Tuesday, March 13, 2007

Garden Card Swap

I joined this wonderful group NeedlesnCrafts last year. The members there mostly are using needles to create their works. I am sooooooo afraid of needles and sure can't using it to create anything beautiful as they do. Fortunately there are still some members who are interested to make cards. Recently we are having our very first card swap, that's Garden Card Swap. I am very excited for this swap and really hope that more people will be interested in cardmaking.So, here is my creation for my partner, Barbara Jack.


I spent about half and one hour to make this pocket card,and mind you, I really had FUN !!!!! There is a bookmark inside the pocket and the frog-and-flowers image can be downloaded from Paper Inspirations Magazine :
http://www.papercraftsinspirationsmagazine.co.uk.


Some of the flowers are stamped flowers, some are images downloaded from Paper Inspirations Magazine and the purple one is from Prima Flowers.


Well, now the supplies needed:

Yellow cardstock
Blue Cardstock
Blue ribbons
3DDragonfly embelishment
Flowers stamps
Copper brads
Wordings woven ribbon
Rubberstamp-Best Wishes(StampingUp)


Method?? You can email me privately, if you wish:-))

RRM-March COTM


RRM-March Sketch COTM

Every month RRM(http://groups.yahoo.com/group/Rubber_Room_Mania) having a Sketch COTM, then we based on the sketch posted on the group and make a card to send to our partner. This is my very first time taking part in Sketch COTM, really excited and am made a card today. Now I show you how to make it, it is really easy !

Supplies:

Brown Cardstock

Black flowers patterned paper

Light brown paper

Cream brown paper

Orange-brown paper

Small flowers diecuts

Rubberstamp: Thinking of You ( StampingUp)

Watercolor pencils-brown color

Black gel pen

Method:

1 Folded brown cardstock to half. Tear the black the black flowers patterned paper and adhere to cardstock. Set aside.

2.Cut the light brown and cream brown paper and layered.

3.Freehand on orange-brown paper to draw tree.Draw stitiches on the tree with black gel pen,adhere to the cream brown paper. Stick flowers diecuts on the tree,draw a black circle on the center of the flowers and draw some spiral with watercolor pencils.

4.Lastly, stamped Thinking of You. Viola.

I will mail this card to my partner, Joy, in USA and I hope she likes it.:-))

Tip:.You can print the tree from the computer(download it from internet) if you are not so confidence to draw it freehand.

Any comments? Welcome to post it.

Friday, February 23, 2007

Midnight work


What do you do at the midnight ? sleeping ? working ? crafting? blogging?

well, for me...while I still enjoyed my Chinese New Year holidays, I usually spent my midnight time with crafting.

And what can you imagine with midnight's color ? black ? grey? or red while you are in higher mood ?

This card maybe different from the cards that I made before. I never thought that black and pink can be mixed ...what do you think ? pink panther and batman ? hahaha....I simply love the combination of the card.....

Tip: Stamped the little flowers with White Ink Pad on the black paper .

Thursday, February 22, 2007

Little bug and spring flowers


Based from the Papercrafts magazine's project, I made this little bug and spring flowers card.


Mind you, learned from my stamping group RRM's member Connie Hobbs, I fooled you with a technique on this card. Could you guess what is it ?


Look clearly and nearly.....yes, the stitches....I don't know how to stitches but there has stitches on the card...the technique is very very simple...take a needle and make the holes around the card and then with the black gel pen draw the lines along the holes.That's it !! Simple and fun !!


The flowers are stamped and so does the bug. How do you think ?
Tip: Make the little holes with needle and draw the lines with the black gel pen to create a stitches look.

Wednesday, December 27, 2006

Latest Project-Let It Snow Pocket Card


I truly love the snowman and searched for the related projects recently via Papercrafts Magazine, and finally found this. But I customized it and changed a bit to a pocket card. This is the first time I tried out this kind of papercrafts...I love simple card though but just thought it was fun to make something based on magazine feature project.
Supplies:
Blue cardstock
Light blue paper
white paper
orange paper
white ink-Tsukineko
Alphabet stamps
silver wire
silver brads
plastic snowflake charm
black pen

How to make:
1. Make the card base with the blue cardstock-just make the front card.
2. Cut the light blue paper smaller a bit than the card base. Measure and tear the white cardstock like a snowman.
3. Cut the orange paper triangled to be the nose of the snowman and paste on the snowman as the picture shown and draw two small black circle as the eyes.
4. Stamped "Let" " It" "SNOW" on the blue and white papers as picture shown and mount on the white and blue papers.
5.Place and paste the snowman and stamped pictures on the light blue paper as picture shown.
6. Place the silver wire through the plastic snowflake charms and glued over the other side of light blue paper.
7. Make the pocket, the size slightly smaller than the card base.
8. Glue the red snowman ribbon on the pocket.
9.Cut a strip of blue paper and glued some cotton on it to make the snow. Place the brad and the silver wire on the behind of the paper . Place another brad on the pocket as picture shown.

I really had fun to make this pocket card and hopefully whoelse received it will be happy to use it too !!!

Saturday, October 28, 2006

Completed all my swap !!!!

Phew!! What a hectic and stress but surely FUN weeks with making all these swap to be completed, and finally I DONE them all and mailed them out today !!!!!

Now I can shake my legs to start my christmas cards, some RAK.....Have you start to make your christmas cards?

Because Eva is too curious.......


so I display my glue book to Birgit here.....any comments, questions are welcome..:-))
Birgit and I LOVE anything vintage so it was easy for me to create something for her, what I love is what she love, isn't it right, Birgit ? :-))
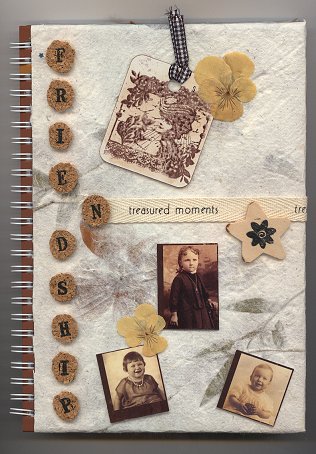
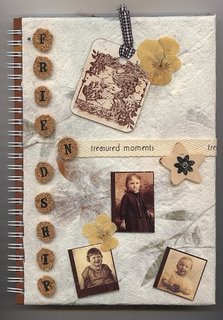
So, I made this glue book with something vintage theme. I firstly wrapped the spiral bound book with handmade papers that my brother bought specially for me from Bangkok last year. It has beautiful flowers' petal and leaves in the handmade papers. I've seen this handmade papers factory in Chingmai ,Thailand with my hubby in 1996, it just something fun and interested when the workers making the handmade papers.Ok, back to my topic today..:-))
After I wrapped the note book with handmade papers, I stamped "friendship" on cork paper then I glued them with crystal lacquer,the result was excellent.. It was really fun and the result look vintage, I think.Then I stamped the women stamp on the formica chip which I distress with the distress ink pad first and tied with black and white gingham ribbon,my favourite ribbon.
Fabric words ribbon was added on the centre of the cover and I added some vintage pictures( I LOVE them soooo much !!!!) and some dried flowers.
Actually the fabric words ribbon was tied and glued to the inside cover , and I glued a white heart paper, then I made a bookmark for Birgit too...unfortunately I forgot to scan the inside cover.
What do you think ? I LOVE my glue book too :-)) I had fun , fun , fun to make it, specially for my friend , Birgit.

Footer